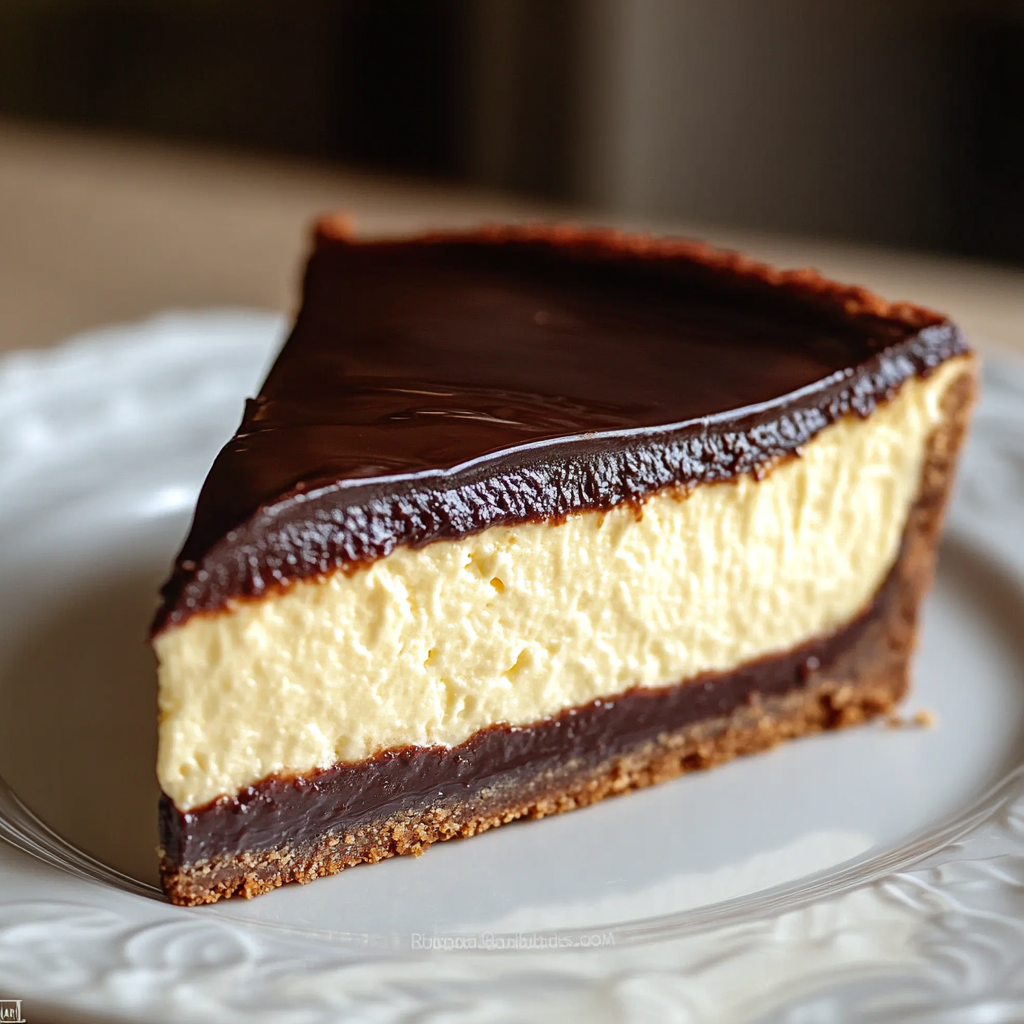
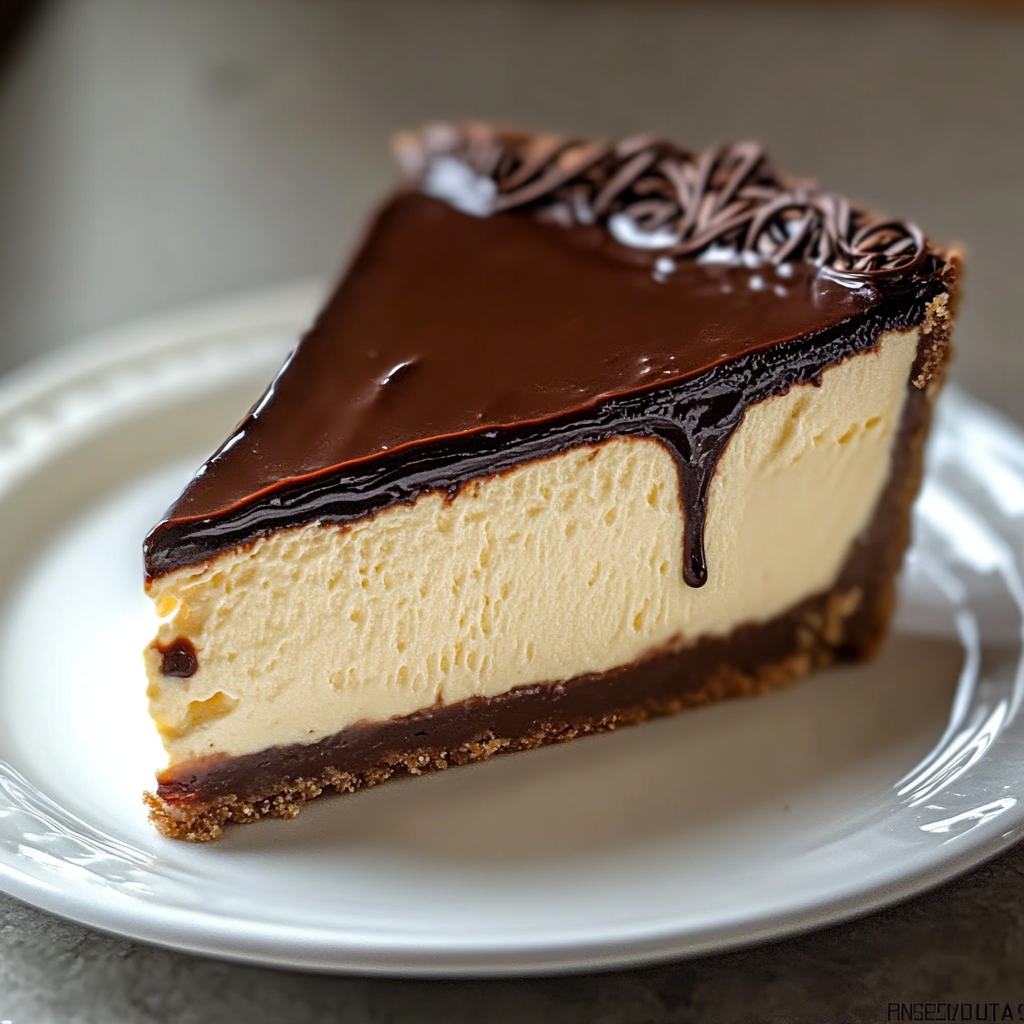
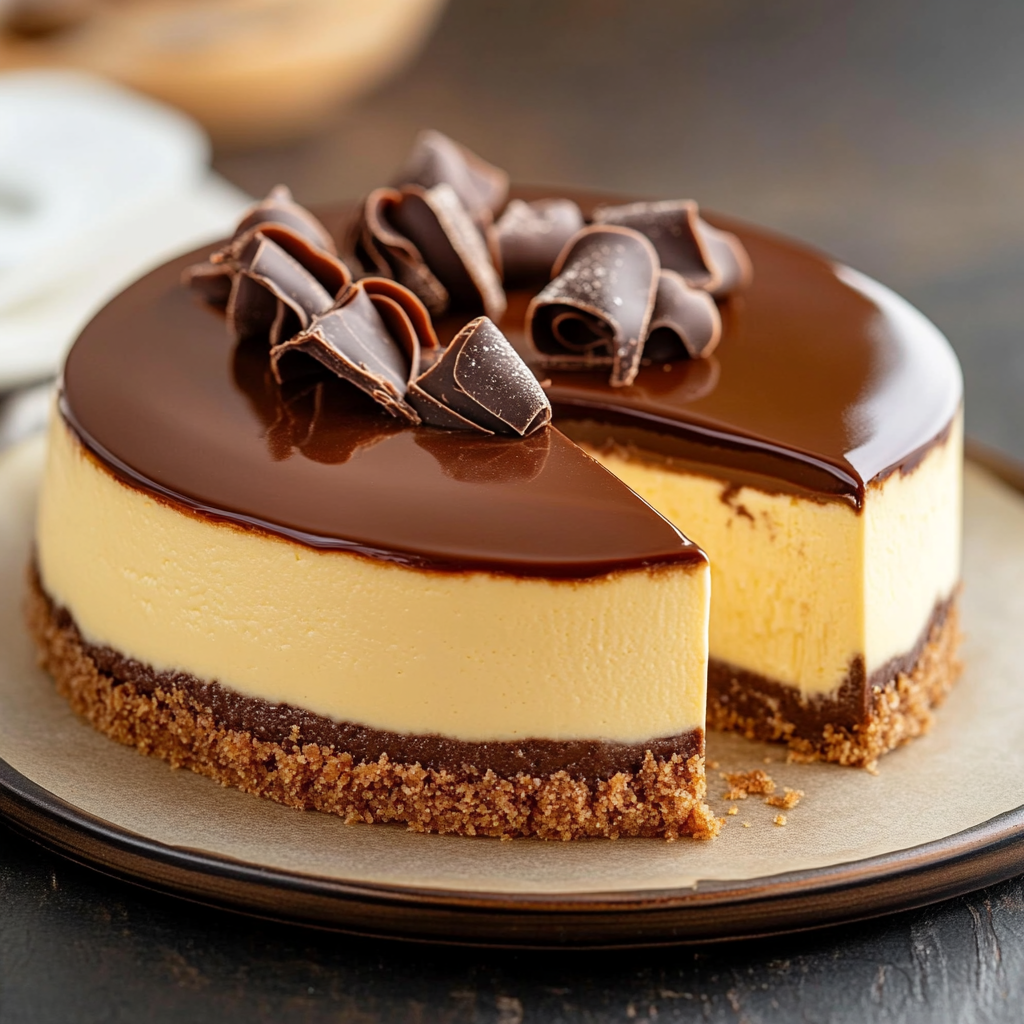
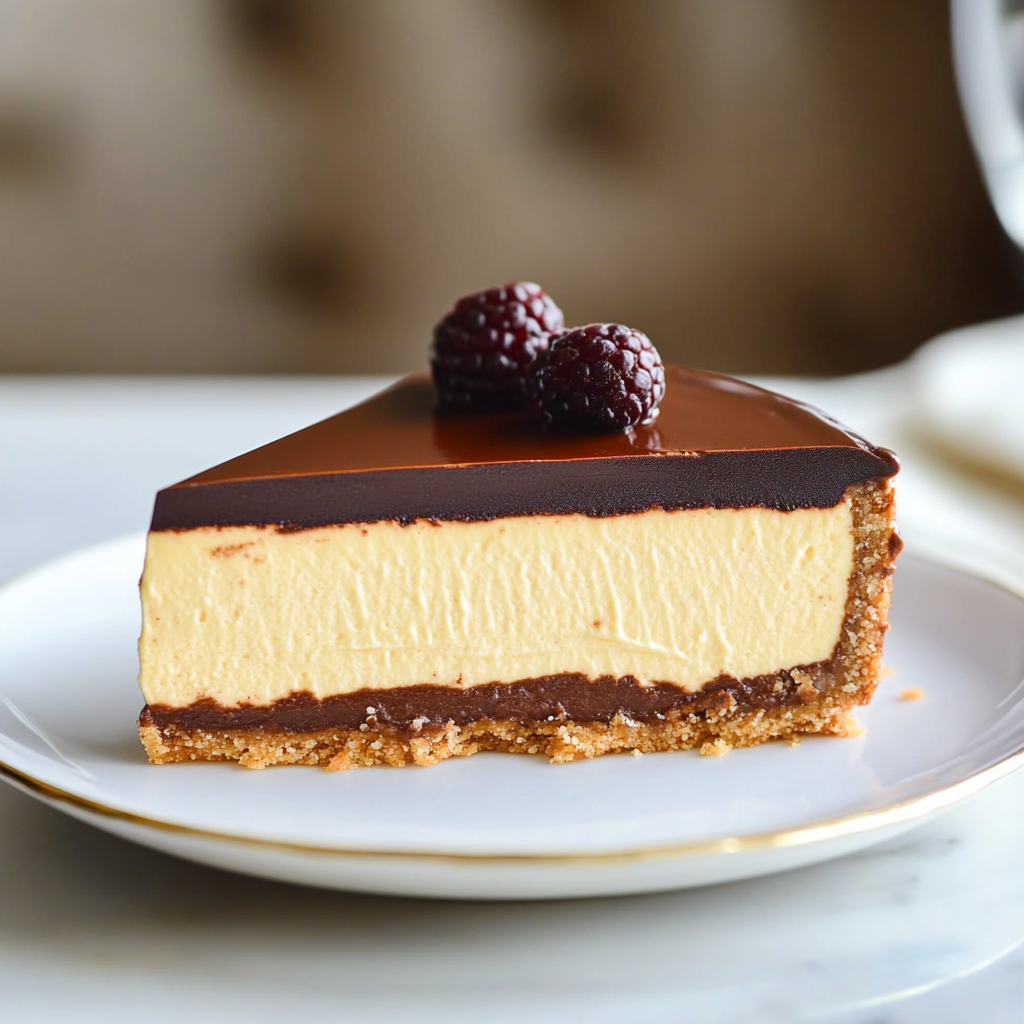
The aroma of freshly baked chocolate mingled with a hint of vanilla wafts through the air as you slice into a luscious piece of Boston chocolate Cream Pie Cheesecake. This dessert is not just a treat; it’s an experience that captures the essence of indulgence. The rich layers of chocolate and cream create a symphony of flavors that play on your taste buds like a well-rehearsed orchestra.

Now, picture this: a family gathering where everyone’s eyes light up at the sight of this stunning dessert. It’s like the moment when you spot your favorite superhero in a movie—pure joy! This cheesecake has become my go-to dish for celebrations, bringing smiles and deliciousness to every occasion.
Why You'll Love This Recipe
- This decadent Boston chocolate Cream Pie Cheesecake is surprisingly easy to prepare, making it perfect for any skill level
- Its rich flavor profile offers an irresistible combination of creamy and chocolaty goodness
- Visually appealing with its elegant layers, this cheesecake is sure to impress guests
- Versatile enough for birthdays or casual gatherings, it’s always a crowd-pleaser
Baking this cheesecake has brought countless delighted reactions from friends and family during special occasions.
Essential Ingredients
Here’s what you’ll need to make this delicious dish:
- Chocolate Cookie Crust: A crunchy base that perfectly complements the creamy filling; choose high-quality cookies for best flavor.
- Cream Cheese: Use full-fat cream cheese for a rich texture; let it soften at room temperature before mixing.
- Sour Cream: Adds a tangy flavor that balances the sweetness; opt for full-fat sour cream to enhance creaminess.
- Granulated Sugar: Sweetens the filling without overpowering it; adjust according to your taste preference.
- Cocoa Powder: Provides deep chocolate flavor; use unsweetened cocoa powder for optimal richness.
- Heavy Whipping Cream: Essential for creating fluffy whipped topping; chill it beforehand for better results.
- Eggs: Bind the ingredients together and add structure; ensure they are at room temperature for even mixing.
- Vanilla Extract: Enhances all the flavors in the cheesecake; use pure vanilla extract for the best taste.
The full ingredients list, including measurements, is provided in the recipe card directly below.
Let’s Make it Together
Preheat your oven to 325°F (160°C). Grease a 9-inch springform pan lightly with butter or cooking spray to prevent sticking.
Prepare the crust by crushing chocolate cookies into fine crumbs using a food processor or by placing them in a zip-top bag and rolling over them with a rolling pin until finely crushed. Mix these crumbs with melted butter until they resemble wet sand.
Press the cookie mixture firmly into the bottom of your prepared springform pan using your fingers or the bottom of a glass to create an even layer. Bake this crust in the preheated oven for about 10 minutes until slightly firm and fragrant.
In a large mixing bowl, beat softened cream cheese until smooth and creamy with an electric mixer on medium speed. Add granulated sugar and continue mixing until well combined and fluffy without lumps.
Pour in sour cream along with cocoa powder and vanilla extract into the mixture. Beat until everything blends together beautifully and there are no visible streaks left—you want pure velvety magic here!
Add eggs one at a time while mixing gently after each addition just until incorporated—not overdoing it keeps your cheesecake from cracking later on. Pour this heavenly batter over your cooled crust in the springform pan.
Bake your masterpiece in the oven at 325°F (160°C) for about 50-60 minutes or until the center is set but still slightly jiggly—think wobbly jelly! Turn off the oven and let it cool inside with the door cracked open to avoid sudden temperature changes that could cause cracks.
Once cooled completely, refrigerate your cheesecake overnight or at least four hours before serving—it’s hard waiting but trust me, it’s worth it! When ready to serve, whip heavy cream until soft peaks form then spread generously over top before slicing into decadent pieces.
Enjoy every bite as you savor this delightful blend of textures and flavors that truly embodies what dessert dreams are made of!
You Must Know
- Baking a Boston chocolate cream pie cheesecake is a delightful journey, combining rich flavors and textures
- The creamy filling contrasts wonderfully with the crunchy crust, creating a heavenly dessert that impresses at any gathering
- Your friends will definitely ask for seconds!
Perfecting the Cooking Process
Start by preparing the crust first to give it time to cool. While it cools, whip up the cheesecake filling and chocolate ganache. This sequence ensures everything melds beautifully and sets perfectly.
Add Your Touch
Feel free to swap cream cheese for mascarpone for a richer flavor or add some espresso powder to enhance the chocolate’s depth. Personalize it to suit your taste!
Storing & Reheating
Store leftovers in an airtight container in the fridge for up to three days. If you want to freeze, wrap it tightly and enjoy within a month for best quality.
Chef's Helpful Tips
- Use room temperature ingredients for a smoother batter; this ensures even mixing and eliminates lumps
- Always let the cheesecake cool gradually before refrigerating to prevent cracks
- Finally, ensure your chocolate ganache is smooth; a double boiler works wonders!
Baking this Boston chocolate cream pie cheesecake always reminds me of my Aunt Linda’s birthday parties where her desserts stole the show every year.
FAQ
Can I use different types of chocolate?
Yes, you can use dark or white chocolate depending on your flavor preference.
How long should I bake the cheesecake?
Bake at 325°F for about 50-60 minutes until just set but slightly jiggly in the center.
Can I make this dessert ahead of time?
Absolutely! It tastes even better after chilling overnight in the refrigerator.