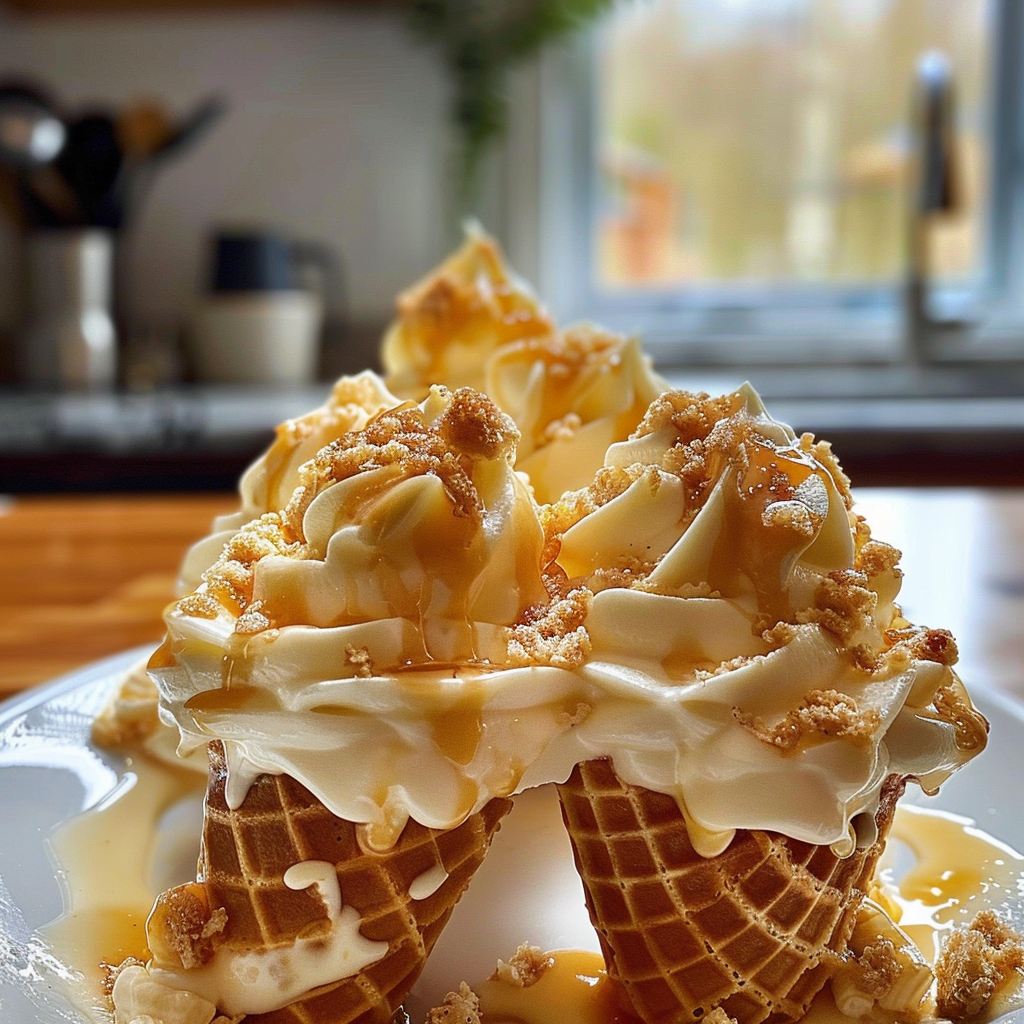
The deliciousness of banana pudding cheesecake cones will tempt your taste buds with their creamy filling and crunchy cone. Imagine the sweet aroma wafting through your kitchen as you prepare these delightful treats, perfect for any gathering or just a cozy night in. soft and sweet vanilla dessert.

Growing up, my grandmother would whip up banana pudding like it was magic. Little did I know then that I’d one day combine her classic recipe with cheesecake in a cone for an unforgettable experience! no bake cookie dough cheesecake.
Why You'll Love This Recipe
- This delightful dessert is easy to prepare and requires no baking at all
- Its luscious flavors blend the creaminess of cheesecake with the nostalgia of banana pudding
- Visually, the cones are a feast for the eyes, making them perfect for parties or family gatherings
- Versatile enough to customize with various fruits or toppings, you can make them your own!
I still remember when I first brought these banana pudding cheesecake cones to a family barbecue; everyone’s faces lit up with joy as they took their first bite! For more inspiration, check out this banana bread cookies recipe recipe.
Essential Ingredients
Here’s what you’ll need to make this delicious dish:
Vanilla Wafers: Choose fresh wafers for the best crunch that mimics the classic pudding texture.
Bananas: Go for ripe bananas; they offer natural sweetness and a creamy texture.
Cream Cheese: Use softened cream cheese for easy mixing and a rich flavor profile.
Powdered Sugar: This adds sweetness without the grit of granulated sugar—perfect for smooth cheesecakes.
Heavy Whipping Cream: It provides fluffiness and richness to your cheesecake filling.
Ice Cream Cones: Opt for regular cones or waffle cones based on your preference for added texture.
The full ingredients list, including measurements, is provided in the recipe card directly below.
Let’s Make it together
Prepare the Filling: Begin by softening cream cheese in a mixing bowl until smooth. Add powdered sugar gradually while mixing until fully incorporated into a silky texture.
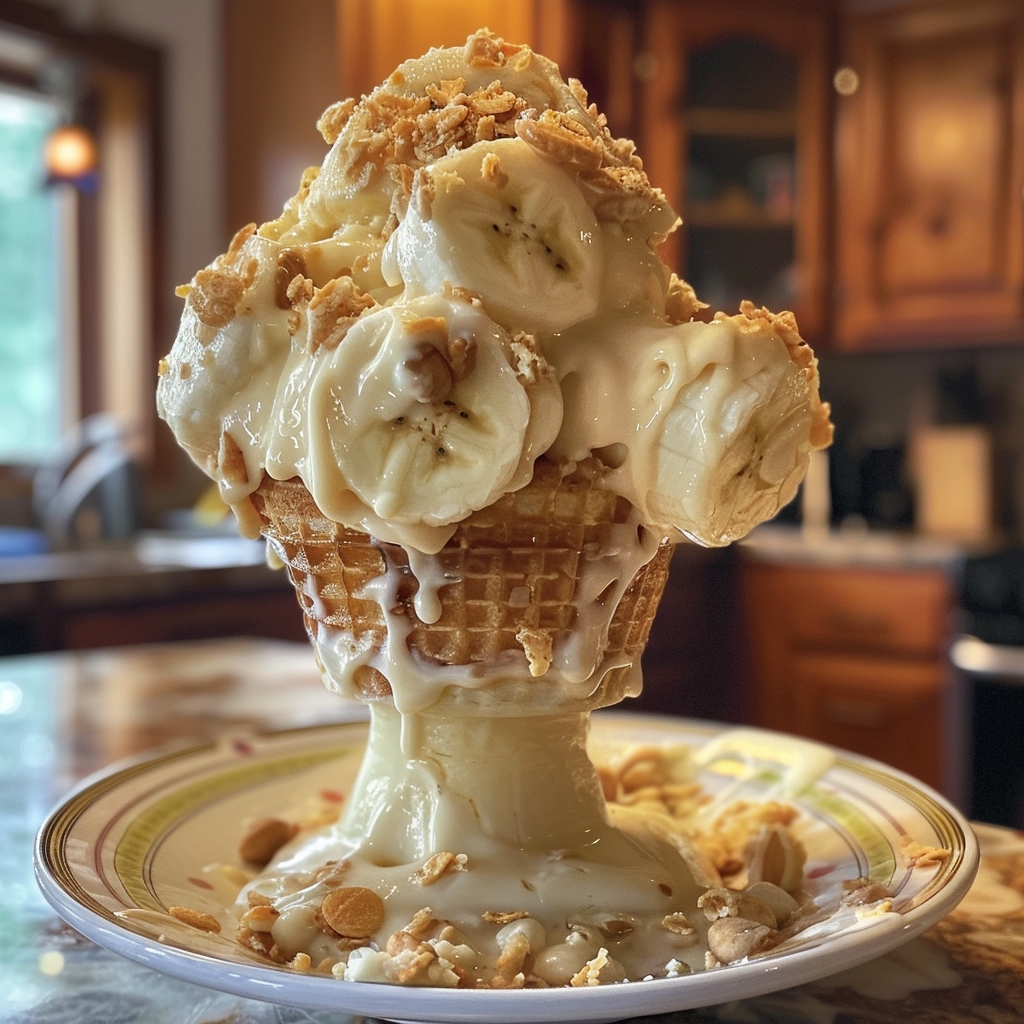
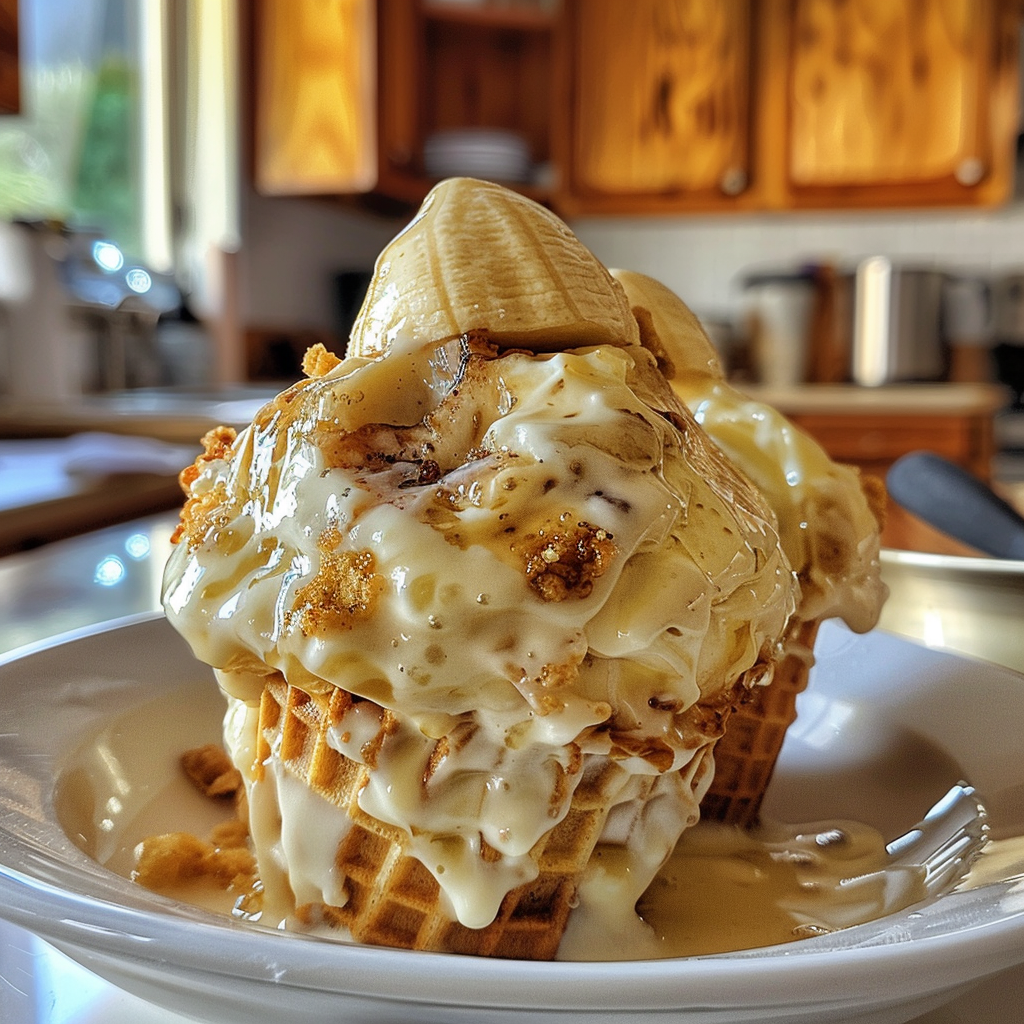
Add Bananas and Cream: Slice ripe bananas into small pieces and fold them into the cream cheese mixture gently. Incorporate heavy whipping cream until fluffy peaks form, ensuring lightness.
Assemble the Cones: Take your ice cream cones and fill them generously with your creamy banana mixture. Pack it down lightly so each bite has plenty of flavor.
Add Toppings and Final Touches: Crush some vanilla wafers and sprinkle them on top for extra crunch. You can also drizzle caramel sauce if you’re feeling adventurous! For more inspiration, check out this honey garlic soy sauce chicken recipe.
Chill Before Serving: Place assembled cones in the refrigerator for at least 30 minutes to allow flavors to meld together beautifully before serving.
Enjoy crafting these banana pudding cheesecake cones! They are not only delicious but also bring back fond memories of family gatherings, laughter, and good times spent over food.
You Must Know
- This delightful Banana Pudding Cheesecake Cones blend two classic desserts into one fabulous treat
- The creamy texture of the cheesecake combined with the crunch of the cone creates a heavenly experience that’s hard to resist
- Perfect for parties but easy enough for a weeknight snack
Perfecting the Cooking Process
Start by preparing your cheesecake filling and allowing it to chill while you set up your cones. Layering the filling with bananas and whipped cream ensures even distribution and a delightful surprise in every bite.
Add Your Touch
Consider adding crushed vanilla wafers or chocolate chips for an extra layer of flavor and texture. chocolate marble banana bread You can also swap bananas for strawberries or blueberries for a fun twist on this classic.
Storing & Reheating
Store any leftover cheesecake filling in an airtight container in the fridge for up to three days. Avoid assembling cones ahead of time to keep them crunchy; simply fill as needed.
Chef's Helpful Tips
- Use ripe bananas for optimal sweetness and flavor in your Banana Pudding Cheesecake Cones, ensuring they are just spotty enough
- Make sure to whip your cream until stiff peaks form, creating a light and airy topping
- Always chill your cheesecake mixture well before filling cones for the best results
Creating Banana Pudding Cheesecake Cones has turned into a family tradition at our gatherings, often resulting in friendly debates over who gets the last cone. strawberry cheesecake dessert Laughter fills the room as we savor each delicious bite, making memories that last far longer than dessert itself.
FAQ
What is the best way to serve Banana Pudding Cheesecake Cones?
Serve immediately after assembly for maximum crunchiness and freshness.
Can I make Banana Pudding Cheesecake Cones ahead of time?
Prepare filling in advance but avoid assembling cones until serving time.
What can I substitute if I don’t have bananas?
Try using strawberries or raspberries as delicious alternatives for fresh fruit flavor.

Banana Pudding Cheesecake Cones
- Total Time: 15 minutes
- Yield: Makes 4 servings 1x
Description
Treat yourself to a delightful blend of creamy cheesecake and nostalgic banana pudding, all served in a crunchy cone. Perfect for gatherings or cozy nights in, these easy-to-make, no-bake cones are sure to impress with their luscious flavors and stunning presentation. Customize them with your favorite toppings for an unforgettable dessert experience.
Ingredients
- 1 cup vanilla wafers (crushed)
- 2 ripe bananas (sliced)
- 8 oz cream cheese (softened)
- 1 cup powdered sugar
- 1 cup heavy whipping cream
- 4 ice cream cones
Instructions
- In a mixing bowl, soften the cream cheese until smooth. Gradually mix in powdered sugar until fully incorporated.
- Gently fold in sliced bananas and then whip heavy cream until stiff peaks form. Fold the whipped cream into the banana mixture.
- Fill each ice cream cone generously with the creamy filling, lightly packing it down.
- Top with crushed vanilla wafers and drizzle caramel sauce if desired.
- Chill cones in the refrigerator for at least 30 minutes before serving.
- Prep Time: 15 minutes
- Cook Time: 0 minutes
- Category: Dessert
- Method: No-Bake
- Cuisine: American
Nutrition
- Serving Size: 1 cone (85g)
- Calories: 270
- Sugar: 20g
- Sodium: 150mg
- Fat: 16g
- Saturated Fat: 9g
- Unsaturated Fat: 7g
- Trans Fat: 0g
- Carbohydrates: 29g
- Fiber: 1g
- Protein: 3g
- Cholesterol: 40mg
Keywords: For added texture, consider incorporating chocolate chips or other fruits like strawberries or blueberries. Store leftover filling in an airtight container for up to three days but fill cones just before serving to maintain crunchiness.