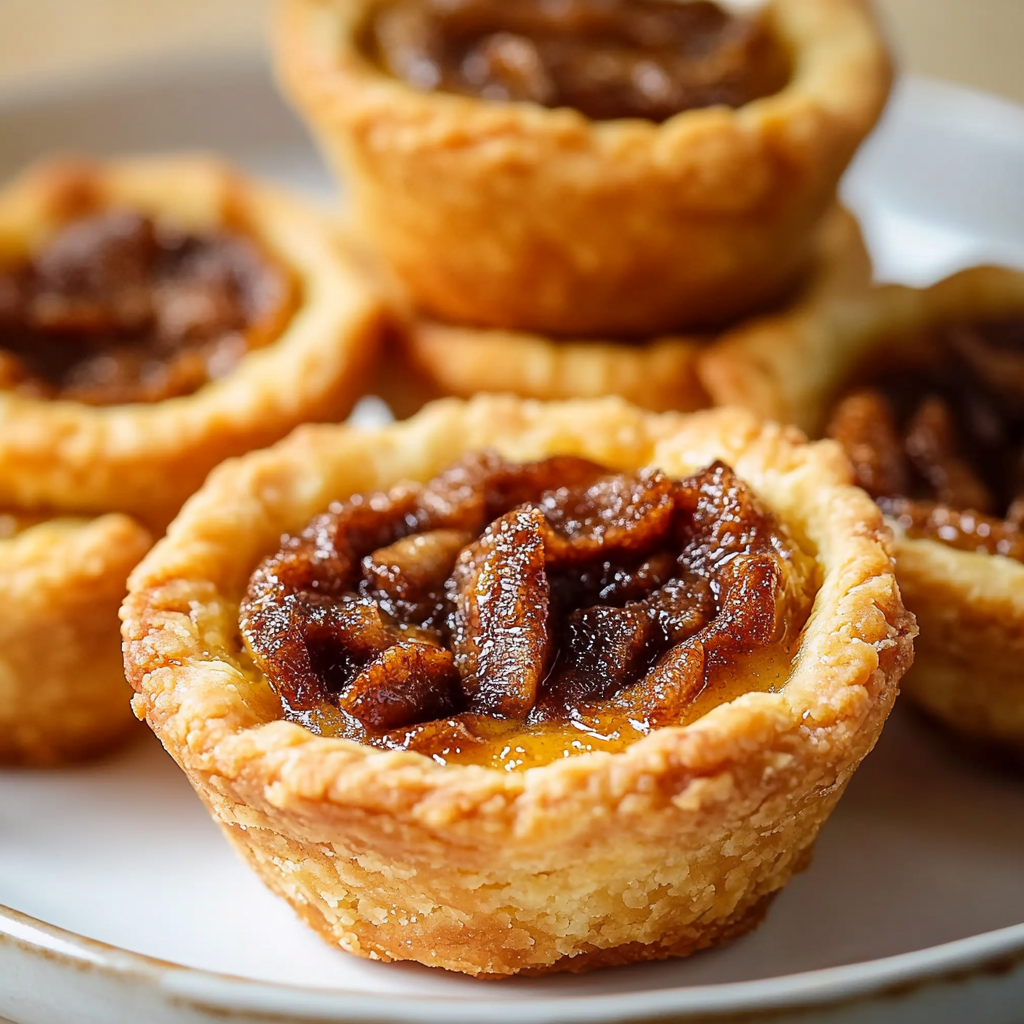
The sweet aroma of freshly baked Classic Canadian Butter Tarts wafts through the air, promising a delightful experience. Their golden crust fills you with anticipation while the gooey filling beckons for a bite.

Growing up, I remember my grandma’s kitchen flooded with warmth as she whipped up these tasty treats during family gatherings. Nothing beats the joy of sharing these little gems filled with nostalgia and love.
Why You'll Love This Recipe
- These Classic Canadian Butter Tarts are incredibly easy to make and require minimal ingredients
- Sweet and buttery flavors blend perfectly with a flaky crust
- Their charming appearance makes them an eye-catching addition to any dessert table
- Enjoy them warm or at room temperature for ultimate satisfaction
I still chuckle when my friends try to resist just one more tart; it never works out in their favor!
Essential Ingredients
Here’s what you’ll need to make this delicious dish:
- All-Purpose Flour: A versatile choice that provides structure; sift it for a lighter texture.
- Unsalted Butter: Use cold butter for flaky pastry; it melts beautifully during baking.
- Granulated Sugar: Sweetens the filling; feel free to substitute brown sugar for a richer flavor.
- Eggs: The binding agent that creates that luscious filling; use large eggs for consistency.
- Vanilla Extract: Adds warmth and depth; opt for pure extract if possible.
- Salt: Just a pinch enhances flavors; don’t skip it!
- Pecans or Raisins (optional): For added texture and flavor; they can be a fun surprise inside your tarts.
The full ingredients list, including measurements, is provided in the recipe card directly below.
Let’s Make it together
Prepare the Dough: Start by mixing flour and salt in a bowl. Cut in cold butter until the mixture resembles coarse crumbs. Add ice water gradually until it forms a dough.
Chill the Dough: Wrap the dough in plastic wrap and refrigerate it for at least 30 minutes. This step ensures your pastry will be tender and flaky.
Make the Filling: In another bowl, whisk together granulated sugar, eggs, vanilla extract, and salt until smooth. You want a creamy consistency that promises sweetness!
Roll Out the Dough: On a floured surface, roll out your chilled dough to about 1/8-inch thickness. Cut into circles using a round cutter or cup to fit your tart pans.
Assemble the Tarts: Gently press each dough circle into prepared tart pans. Fill each shell with about 1 tablespoon of the sugary filling. Don’t overfill; we want them to bake up perfectly!
Bake to Perfection: Preheat your oven to 350°F (175°C). Bake for 20-25 minutes or until the edges are golden brown and the filling is bubbly but not set completely.
These steps create an aromatic adventure that ends with you indulging in warm tarts fresh from the oven!
Now you know how to create these delightful treats yourself! Enjoy them solo or share with friends — but good luck trying not to eat them all at once!
You Must Know
- Classic Canadian Butter Tarts are delectable treats that balance sweetness and richness perfectly
- These tarts are a national treasure, and mastering them can impress anyone
- The gooey filling and flaky crust create a delightful texture that’s hard to resist
Perfecting the Cooking Process
Start by preparing your pastry crust first; chill it while you make the filling. This ensures a flaky texture. Bake the tarts until the filling bubbles slightly, but avoid overcooking them to keep that delicious gooey center.

Add Your Touch
Feel free to experiment with fillings by adding raisins, pecans, or even chocolate chips for a twist. You can also swap out vanilla for maple extract for an extra Canadian flair. This personalization makes each tart uniquely yours.
Storing & Reheating
Store leftover butter tarts in an airtight container at room temperature for up to three days. If you want to enjoy them warm, reheat in the oven at 350°F for about 10 minutes for the best texture.
Chef's Helpful Tips
- Always chill your dough before rolling; this keeps it firm and prevents shrinkage during baking
- Monitor your tarts closely in the oven—overbaking leads to tough fillings instead of that perfect gooeyness
- Use fresh ingredients for the best flavor and texture!
Making these butter tarts reminds me of my grandmother’s kitchen filled with laughter and sweet aromas, where every bite was a taste of home.

FAQ
What is the secret to a flaky crust?
Using cold butter and chilling your dough helps achieve that perfect flakiness.
Can I freeze butter tarts?
Yes, you can freeze baked butter tarts for up to three months; just thaw before serving.
How do I know when my tarts are done?
The filling should be bubbly but slightly jiggly in the center when they are ready.